uTest University Course – What is Exploratory Testing?

I recently authored a course with my good friend Allyson Burk for the uTest University on Exploratory testing. This is a heavily viewed course because it’s part of the “Getting Started at uTest” course track which most new uTesters work through. Since this course is a foundational piece of new uTester’s development, I spent a large amount of time researching and editing to make this as accurate and consumable as possible. So far it’s been well-received earning a 5-star average rating – Not too shabby.

https://university.utest.com/what-is-exploratory-testing/

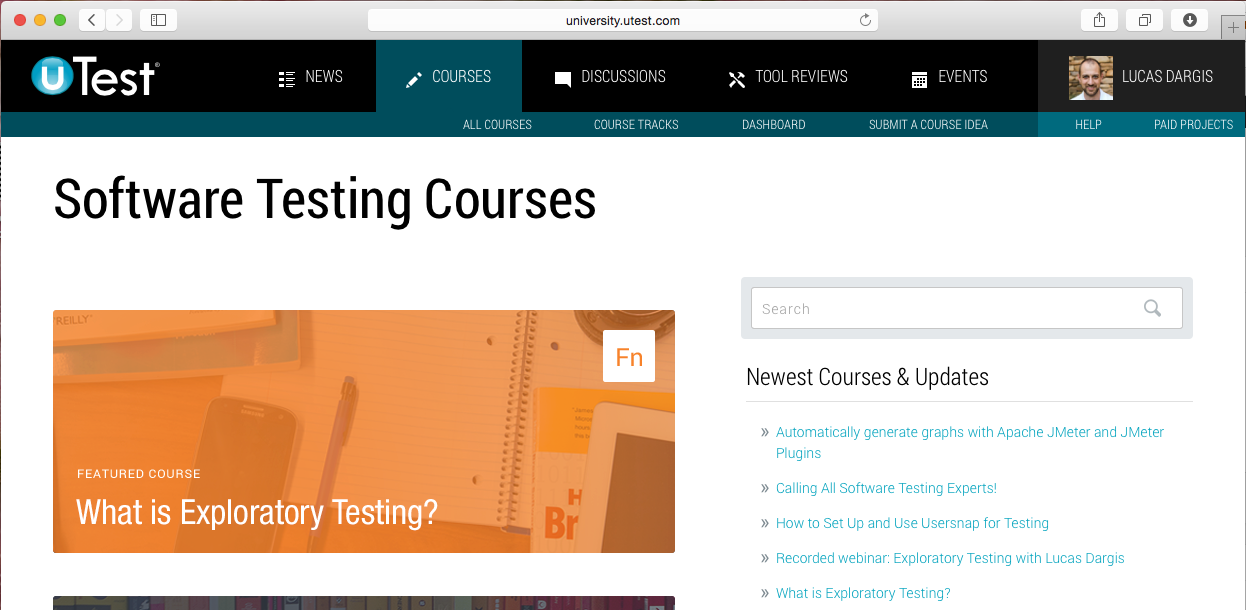
It even got front-page billing on the University home page:
University Home Page - ET


Below is the content of the course:

INTRODUCTION

Today’s development world is much different than it was 10 or even 5 years ago. Product development is fast-paced and must meet the high expectations of users. As development practices have changed, so too have approaches to testing. Many testers are finding that Exploratory Testing (ET) is an effective way to test in these circumstances. The adoption and use of ET has rapidly grown, to the point where it is arguably the most popular testing approach used today.

In this course we’ll start by learning what ET is and how it differs from scripted testing (ST). Then we’ll look at why you should use ET and finally, we’ll wrap up by showing you how to get started. So let’s make like Magellan and start exploring!

THE ‘TRADITIONAL’ APPROACH TO TESTING

Before we look at ET, it might help if we first talk about a different, more traditional approach to testing so we can use that as a reference point to make some comparisons.

Scripted Testing (ST) is a two-step approach to testing. First the tests are written; they are planned, designed and documented. Second, the tests are executed. These two activities are done independently of each other and in many cases, the person who writes the tests is different than the person who executes them.

Generally, the tester executing the tests has some knowledge of the product, or the tests include the information needed to execute them. This is important because without that knowledge or information, the tester might not be able to execute the test or interpret its results.

WHAT IS EXPLORATORY TESTING?

Now lets compare that with ET which is simultaneous learning, test design and test execution. In other words, the tester is designing his or her tests and executing them at the same time. As an exploratory tester, your next action (the next test) is influenced by your previous actions, your observations of the product’s behavior, and your own thought process.

ET also assumes that a significant portion of the testing will be spent learning about the product. As you explore, you become more aware of how the product functions and its expected behavior. You can use that knowledge to design new and better tests. It also helps improve the analysis of the test’s results.

ET table

It is important to make the distinction between ET and other types of unscripted testing because some testers mistakenly believe that all unscripted testing is simply poking the product randomly to see what happens. Performing a series of random actions is called monkey testing and in some cases it may be a valid approach, however this is quite different from ET. With ET actions are the opposite of random — they are deliberate, driven by human thought and reasoning. Your approach is continually refined as new information is gathered and analyzed.

When an explorer goes to an uncharted region of the world, they spend months preparing. They go with a goal in mind and they rely on their abilities to adapt to changing situations. Similarly, an exploratory tester must prepare. They too have a goal and the skills needed to adjust their course. It’s true that monkey testing may occasionally find useful information, but it’s found unexpectedly. It’s the difference between discovery and exploration; luck versus skill.

WHY DO EXPLORATORY TESTING?

One of the most defining qualities of humans is our ability to think. It’s what makes us unique. It allows us to analyze a situation and make decisions, or come up with new ideas, or find new solutions to a problem. We have the capability to learn and continuously improve.

Henry Ford once said “If you always do what you’ve always done, you’ll always get what you’ve always got.” Executing scripted tests over and over will generally produce the same results. Exploratory testers use their cognitive abilities to continually improve the value of their work. They explore and adapt, they learn and adjust. ET is designed to make the most of our intellectual abilities.

ET also takes advantage of the differences between testers. Each tester’s previous experience, skills, and thought process (among other things) causes him or her to view thing in a unique way. Different testers may come up with different ways to test the same function. It may be more beneficial to have three testers test the same function in three unique ways than it is to have all three test it in exactly same way.

In many cases we need to use ET because there is no other alternative. For example, consider a situation where the tester isn’t familiar with the product under test and scripted tests are not available. In this case, it’s up to the tester to study the product, design and execute their tests. As we’ve already seen, this is the very definition of ET.

It can take a significant time to read, comprehend, and execute each step in a test case. This is especially true if you don’t already know the product, or the TC uses language or terms you’re not familiar with. When a tester is tasked to find bugs quickly, they need to be searching for bugs, not reading test cases. They need the freedom to follow promising leads, not the constraints of predefined instructions.

HOW DO I GET STARTED?

If there is one thing all new testers (including new exploratory testers) should do, it’s to start by thinking about the product in general terms; try to see the big picture. Instead of initially focusing on one specific thing, first try to understand the context in which you are working.

Some questions to consider are:

  • Is this a product in development or is it already in production?
  • What is the purpose of the product?
  • Who are the users and how are they going to use it?

Jumping right in and banging on things might produce a bug or too, but if you hope to get the most out of ET, initial preparation and understanding your context is vital.

Now lets see how ET might look in practice. Imagine you’re a brand new tester, your boss comes to you and on your first day and says, “Here you go, this is the latest version of our app. Please begin testing and report any bugs you find.” There are no test cases and no documentation. What do you do? An exploratory tester would do something like this:

1. Get a notebook (or a digital word processor) to take notes as you go.

2. Explore the app as if you just downloaded it and want to use it yourself. If it is not an app you would typically use, then imagine you are the target market for the app.

Take a moment to really get in the mindset of a typical user. Some questions you can ask yourself are what is the goal of this app? Who would benefit from that? How do they benefit?

Let’s say this is an app to show up-to-date stock market information.

Goal of the app: Having stock market data at your fingertips.

Who benefits: Someone who is financially savvy or wants to be and has available income to be investing or has interest in other people’s investments.

How do they benefit: They benefit by the data being timely, accurate, easily accessible and displayed in a way that they can understand quickly.

Don’t worry about finding any bugs right now. You may stumble on them, but this is really just getting used to the app. Jot down anything you find that you want to explore further later.

3. Once you get a feel for the app start going back to the areas that interested you and you thought might be a place of vulnerability in the app. This knowledge about vulnerability is going to come with experience. Don’t worry if you don’t have any experience yet because you are about to get some!

4. One by one, work through each area you’ve earlier identified, exploring every function in that area. Think of what a real user might do. Come up with with some use cases or scenarios and execute those. Then think of variations and execute those. Use the results of your tests to help you come up with new ideas.

5. Focus on one bug at a time, but always be on the lookout for hints of other bugs or suspicious areas. In your notebook, quickly make a note of these areas and how to get back to them. This way you can come back and explore each one later. You could very well end up with 4 or 5 bugs just from investigating the initial bug.

6. Once you’ve exhausted that area or function of the app, move on to your next point of interest. As you repeat this process, remember what you’ve learned so far and use that information to influence your tests.

As you can see from this narrative, you are simultaneously learning, designing tests, and executing the tests. These are the core pieces of ET. Understand this and you’re on your way to becoming an exploratory tester.

CONCLUSION

Different testing needs call for different testing approaches and there are many situations where ET can prove most beneficial. ET is the inverse of scripted testing because it relies on human intellect as opposed to simply following instructions. ET is a process of continual refinement and improvement where testers adapt to situations and the information they’ve gathered. Now that you’ve been introduced to ET, our hope is that will continue to explore exploratory testing and that you can use these skills to provide the most value possible.

ADDITIONAL READING

Two contributions to the uTest University

Back in December of 2013, uTest officially launched the uTest University (blog post) which is intended to be a single source for testers of all experience levels to access free training resources. This is a neat opportunity for testers to contribute to the growth and development of the testing community by creating courses and writing articles. The university also offers  Author Page

My first course was derived from a uTest forum’s post I I wrote back in June of 2013. I was on a cycle where the customer required logs from Charles Web Debugging Proxy be attached to every bug report, but none of the testers (myself included) or the knew what that was or how to use it. I spent some time learning how to use the tool and then put together a tutorial to share with the rest of the team. Fast forward 8 months later several other customers started required the same thing. To make the information a bit easier to find the tutorial was turned into a uTu (uTest university) course:
How to Set Up Charles Web Debugging Proxy for iOS Devices and Windows 8

My second course came at the request of the uTest Community Management team. They needed a tutorial for new testers to show them how to create videos (screencasts) of their bugs. They specifically wanted it based around the free tool Screencast-O-Matic. I had actually never used that tool before, so I spent some time getting familiar with the tool. I also compiled a list of suggestions and tips based on things I see frequently in the videos of other testers. The result is:
How to Set Up and Use Screencast-O-Matic


Webinar – Three more uTest Panel webinars

It’s been a busy past few weeks. In addition to picking up two new enterprise customer accounts (uTest TTL work) I was a panelist for three more uTest webinars.

Maximizing Your Benefit From The uTest Forums
http://forums.utest.com/viewtopic.php?f=55&t=4985

Maximizing Exploratory Testing Methods
http://forums.utest.com/viewtopic.php?f=55&t=4984

How to be a Quiet Tester That Customers Shout About
http://forums.utest.com/viewtopic.php?f=55&t=4986


Testing with the Microsoft Surface RT

About the Device

The Microsoft Surface RT is a interesting device to test with. It has the new Windows 8 interface, but it also still has the traditional desktop interface because not all things can be accomplished on the Windows 8 side. This can make things a little confusing, especially if you are just starting to test with this device. So, here are some instructions to help you get ready to set up and back to testing in no time.

Installing Apps

When we are testing apps that are in development, they are not available in the Windows Store so we will need to manually install them. Usually, you will be given a zip file that contains all the files you need.

  1. Download the zip file
  2. Go to your Desktop and locate the zip file (Should be in your Downloads folder)
  3. You can’t install directly from a zip file so you need to extract the files
  4. Long tap/release (or right-click if you have a mouse) to open the context menu
  5. Tap on ‘Extract All…”
  6. Select the location where you want the files saved to and tap ‘Extract’
  7. The extracted folder will open
  8. Locate the Windows Powershell Script (should have a Notepad icon)
  9. Long tap/release (or right-click if you have a mouse) to open the context menu
  10. Tap ‘Run with PowerShell’
  11. You’ll see a series of prompts, accept all of them
  12. If this is the first time you’ve installed an app, you’ll be required to sign up for a development license. It’s free and it has just a few simple steps
  13. After the application is installed, the PowerShell windows will just close. There is no indication that it was installed, but when you go back to your home screen, you should see the app on the far right

Uninstalling apps

  1. On the home screen, drag the app icon down just a bit until a check mark shows up just above the icon
  2. Release the app and the action menu will open from the bottom of the screen
  3. Tap ‘Uninstall’ to remove the app

Error logs

The Surface RT essentially is a PC, so application errors and crashes will be logged in the Event Viewer just as they are on a regular Windows desktop or lap top.

How you access the Event Viewer on the Surface RT is more complicated than on a regular PC since there is no Start button or search function. Here is how you can add a link to the Event Viewer to your desktop:

  1. From the Home screen, tap on ‘Desktop’
  2. Long tap/release (or right-click if you have a mouse) to open the context menu
  3. Select Personalize
  4. In the ‘Search Control Panel’, search for Event Viewer
  5. Tap on Administrative Tools(or Navigate to Control Panel > System And Security > Administrative Tools)
  6. Long tap/release (or right-click if you have a mouse) on Event Viewer to open the context menu
  7. Tap Send To > Desktop (create Shortcut)

Now that you have the event viewer open, you can view error messages and save the error files to attach to your bug reports.

  1. On the left pane, tap on Windows Logs >> Application
  2. On the right pane, tap on ‘Filter Current Log…’
  3. Select ‘Error’ and tap ‘OK’
  4. Select the error log(s) you want and on the right pane, tap ‘Save Selected Events’
  5. Save the events wherever you like and you can attach them to your bug reports

Taking Screenshots

Screenshots are pretty easy to take. You need to press the home button (Windows icon on the front of the Surface) and the down volume button (left side of the Surface) at the same time.
The file will be stored in your Photos > Pictures library > Screenshots folder

Taking Video

A well-created external video is usually the best way to go as I’ve done in all the above videos. Check out this post for some tips to improve your external videos.
I haven’t found a way to create mirrored videos yet, but I’ll update this if I do.


Bug Fix Failure Alerts Using TFS 2012 Scrum Process Template

My team is using Microsoft TFS 2012 Team System Web Access with the Scrum 2.2 Process Template as our Scrum management tool. We treat bug work items similar to how we deal with PBI’s, in that we assign tasks to the bug to complete the work. Usually this results in only two tasks: One development task to fix the bug, and one testing task to verify the fix and look for any related regressions around that fix.

When the developer has completed the bug-fix task, they use the task board to move their task from the ‘In Progress’ column, to the ‘Done’ column. But what should happen when the tester determines that the bug isn’t fixed? Well, the tester moves the development task back to the ‘To Do’ column and puts a note in the history field detailing the reason why the task wasn’t done.

The problem we were having is that the developers wanted to know when their bug fixes were not complete. Usually they would find out the next morning during our daily Scrum meeting, but they wanted to know right away. I solved this problem by using the Alerts feature available in TFS 2012.

  1. From your Team System Web Access site, click the settings button (the gear icon in the top right of the page)
  2. Select the ‘Alerts’ tab
  3. In the left navigation, select the ‘Team Alerts’ section
  4. Select ‘Work Item Alerts’
  5. In the main body of the page, click on ‘New…’
  6. In the ‘SELECT NEW ALERT TEMPLATE’ window, select ‘A change is made to a work item that is assigned to me’ and click ‘OK’
  7. Give the alert a more descriptive name
  8. Add 3 new clauses: Work Item Type = Task, State Changed From Done, State Changed To To Do
  9. Click OK

You’re all set. Your developers will start receiving emails when their bug tasks are moved back to the ‘TO DO’ column.

Here’s a quick video that walks you through the above steps:
How to add a bug-fix alert in TFS

5 Ways to Improve Your Bug Titles

I originally posted on the uTest forum here.

Bug titles are one of the most important pieces of you bug report. They are the face of your bug, they show the its value and can help or hurt the overall efficiency of the test cycle. Far too often testers don’t give their bug titles the attention they deserve. This post will try to change that. Here are 5 tips to help you improve the titles of your bug reports.

Consider Your Audience

Like the bug report itself, the title is intended to convey information. The main difference is the title is more concise. A well written title will quickly and clearly summarize the bug and its value.

To communicate this information effectively, you need to consider your audience. Bug titles are read by different audiences who may use the title for different reasons. Testers have the difficult job of writing a title that satisfies the needs of two different audiences at the same time: The customer and your fellow testers.

Customer
When the customer or Test Team Lead (TTL) reviews the bug list, one of the first things they do is look at the title. As we talked about in Reporting High-Value Bugs – Part 2, part of reporting high-value bugs is “selling” it to the customer. The title of your bug is part of your sales pitch. Always keep the title short and to the point. You want to focus on the end result, not the actions. For example:

Use “User profile – Unable to link to Facebook” instead of “Clicking the ‘Link to Facebook’ button doesn’t do anything

Also use words that action words that convey importance such as ‘prevented’, ‘does not’, ‘inconsistent’, ‘unexpected’ etc.

Fellow Testers
Your fellow testers use the title of your bug in a very different way. They use it to determine if the bug they found has already been reported. To help them, you need to include the key words they will be searching for.

Hopefully, before you report your bug, you search the bug list see if it has already been reported. Make a note of what you searched for because those are the words you should consider including in your title.

In Reporting High-Value Bugs – Part 2 we also talked about reporting the root cause of the bug. The same is true for the title. Your title should describe the underlying problem, not one of its many possible symptoms.

Follow the uTest Standard

uTest has a crash course dedicated to Bug Title standardization so I’m going to point you there first: http://help.utest.com/testers/crash-courses/general/bug-title-standardization

To summarize that post, every bug should be broken apart into two distinct parts. The “Area” and the “Description” The area is the place in the application where the bug occurs. The description is a brief summary of the bug. These two areas should be separated by a hyphen.

For example, in this bug title:
Homepage – The ‘Contact Us’ button is linking to the incorrect page
“Homepage” is the area and “The ‘Contact Us’ button is linking to the incorrect page” is the description

This can get a little tricky when the area is deep in the application. If there was a bug in the uTest platform on the payments screen in the Account & Settings section how should we identify that area?

In the link above, one of the authors suggests you write it like this:
Account & Settings – Payments – Total payout amount is incorrect

Personally I don’t like this suggestion. Testers who do this tend to put the navigation steps in the bug titles. That is not the place for that information. Plus having more than two sections makes the title difficult to read.

I prefer to list only the broad area of the application and include the more specific area in the description. Here is how I would write this title:
Account & Settings – The total payout amount on the Payments page is incorrect

Do Not Specify the Test Environment

Many testers include the device or environment they use to test in the title of their bugs:
[iPhone 5] User profile – Unable to link to Facebook

The landscape that we test against these days is so large that it’s no wonder that this has become more common recently. Testers feel that the device they found the bug on is an important piece of information. While that is true, the title of the bug is not the right place for it.

The main reason that this is a bad practice is because it gives false impression about the scope of the bug. Generally when testers start their bug title with the environment, they are simply stating the device that they found the bug in. But the customer may interpret that to mean that this bug is only present on that device listed in the title.

Unless you have tested against every other possible device/environment, don’t include this information in the title. It adds little value and can actually cause problems.

As with most rules, there are exceptions. Here are two:

Explicitly required
If the cycle specifically tells you to include environment information in your bug titles, you should follow the instructions.

For example, this is directly from a test cycle I recently was on

NOTE – If you find an iPad bug: Please add [iPad – iOS xx] at the beginning of you bug title.

In this situation it is perfectly fine (and even required) that you include the environment in your title.

However, you may see something like this in the instructions:

BUG TEMPLATE: Please include the following info in all your bugs: Mobile device model and OS version Description of bug Wi-Fi or 3G / 4G?

This does not mean that all this information should be in the title. It simply means that it should be specified in the body of the bug. Generally you should put this information in the ‘Specified Environments’ or ‘Additional Environment info’ fields. It is the “Bug” template, not the “Bug Title” template.

Environment specific bugs are allowed
Occasionally a cycle will allow the same bug to be reported for different environments. In this case, each one of these bugs is considered different by the customer. Since the only difference between the bugs is the environment, it is necessary to include the environment in the title. Otherwise you would have multiple bugs with the exact same title and your fellow testers would have to look at the contents of the bug to see which environments had already been reported.

Keep Consistent with Earlier Bugs

Sometimes a cycle will ask you to include some extra piece of information in the title. One example of this would be the build of the application that you tested. What I usually see happen in these situations is every tester comes up with their own way of including this information. The result is a messy bug list that looks something like this:

[b 123] Area – Description
build 123 => Area – Description
Area – Description {build 123 v.2.045.34}
123 Area – Description

This is difficult for the customer and TTL to read and makes it impossible for them to quickly scan through the list.

Assuming that the earlier bugs followed the uTest standard and everything we addressed above, you should follow the pattern established in the first few bugs. Don’t worry about being original or sticking to your own personal preference, the goal is consistency. This will make the customer’s and TTL’s jobs much easier. See how much easier this is to read?

[b 123] Area – Description
[b 123] Area – Description
[b 123] Area – Description
[b 123] Area – Description

Learn From Other Testers

You can learn quite a lot from reviewing the bug reports of your fellow testers. You can see different styles of reporting the reproduction steps, come up with new ideas of how to test, and see which types of devices are the most common.

The same can be said for the bug’s title. When you are reviewing bugs, don’t just skip over the title. Instead, take advantage of the opportunity to learn from the mistakes and successes of others.

First evaluate the title of the bug first on its own:
Does the title follow the standard? Does it include appropriate key words?
Then look at it in the context of the entire report:
Does the title accurately and efficiently summarize the bug? Does it “sell” the importance of the bug?

As you pay more attention to your own bug titles as well as the titles of other bugs, you will start to see the types of patterns we have just talked about. It will become apparent that the testers who do these types of things are the ones that are separated from the crowd. Bug titles are extremely important and should be treated that way. Keep these tips in mind and you will be one step closer to writing the perfect bug report.

I’d love to hear your thoughts on this topic. What other tips can you give your fellow testers?

Reporting High-Value Bugs – Part 2

I originally posted on the uTest Forum.

In Part 1 of this series, we talked about the reasons why a uTester should focus on reporting high-value bugs. That led to some fantastic discussion and a spin-off thread about reporting every bug you find. Before you continue, you should go back and review those threads to get caught up on the topic.

In this Part 2, we are going to look at “HOW” you can find and report high-value bugs. This is a popular topic at uTest and there are many threads, webinars, and crash courses available (There are links to some of that material below). This post is intended to complement those resources and help us continue to improve our testing skills.

I’ve teamed up with fellow TTL and uMentor, Allyson Burk for a double dose of testing goodness :) We have some great ideas for you, so let’s get started!

Finding high-value Bugs

Focus on One cycle at a time (Allyson Burk)

I find there are two approaches to the workload at uTest: 1) accept every cycle, file a few bugs on each or 2) accept fewer cycles, file more bugs per cycle. Personally, I find the latter to be the best way to make more money, have more satisfaction in my work and increase my tester rating. Why? Because I can increase the quality of my work using this approach.

Giving myself more time on a product allows me to be methodical. I might use a few different approaches depending on the type of product.

Deep, power user scenarios. I develop a goal in mind. A recent cycle I was on had a great example of this – you are a soccer mom and you need to equip your child for the upcoming season. This is going to yield the issues that are going to affect the target audience of the client. This approach can definitely yield high value bugs because you will be able to tell the client what is going to drive those target customers away.

Break down the app into areas and dig deep. This is the approach I use when it is a newer, more unfamiliar application. I might spend a few hours in settings making sure each setting combination is functioning properly; or trying a variety of shopping cart, wishlist, checkout scenarios; or product customization. The key is not just spot checking to see if the area is functioning, but to really stretch the code and make sure all variables have been covered.

Going down the rabbit hole. This is a less precise, more intuitive path where I just start investigating the parts of the application that I find interesting and following them as far as I can take them. If I really love the app or find it to be fun to use, this is the approach I will take. You have to be careful with this approach because you can “waste” a lot of time.

The key to all of these approaches is TIME. You cannot test in this deep manner if you do not have time and you cannot have time if you have 5-15 active cycles clamoring for your attention.

(Note from Lucas)
When you accept a new cycle, you are expected to thoroughly read the scope and instructions, read through the known bug list, review any other attached documents, and catch up on any chat posts. Then you have to set up your testing environment. You have to install the app, create an account, configure your proxy, etc. These start-up activities can be quite time consuming. Keeping your active cycles low allows you to spend less time getting ready to test, and more time testing.

Know the status of a project (Allyson Burk)

In general, clients are going to value bugs differently depending on the point in the development cycle they are on. It is important to pay attention to clues about where the client is in development when searching for high value bugs. This can be a moving target depending on the methodology used, agile vs. waterfall for example, but I think for this conversation we can think in terms of early, middle and late in the development cycle.

Early in the development cycle, you can imagine that content related bugs are not going to carry huge value. The look and feel may still be in development, the final copy is likely not completed and images may not have been delivered. The client is rather going to be more focused on core functionality. They need to make sure the major functionality is there and working properly.

Midway through the development cycle, functionality is still going to be the focus, but content starts to be more important. If ever there was a time to value spelling/grammar bugs, this would be it. Most copy has to get locked down for legal/translation/marketing/etc. so the client may be looking to make sure this is completely clean before shipping it off for various approvals.

Late in the development cycle, stability and polish are key. Everything needs to be functioning at this time and the application needs to have a minimum of crashing/blocking issues. Many times in this last stretch before release of a product, the client might only be interested in High or Critical issues. The code will be fairly locked down at this point. The client will often not want to risk fixes that might break other functionality, so they are really going to be interested only in bugs that are of such severity to make the app unusable.

As uTesters, I think the trickiest aspect of this is knowing what phase of the development cycle the client is on. Logic might dictate that if you are on the first cycle for a new client that they would be early in the development cycle. I’d actually venture a guess and say that is actually almost never the case given my experience. I’d say we are usually brought in after the code is pretty stable and the content is beginning to be finished… somewhere in the mid stages.

But how can we know with more certainty?

Sometimes, this is as easy as reading the overview and paying attention to context clues. The PM might explicitly state, this is the first testable build of this product (early) or this is the release candidate (late). There may be things excluded from the scope like images (early to mid). There may be a very long known issues list (mid to late) or no known issues at all (early or late – HA this is a tricky one! They may clear all known issues for the later builds in order to make sure there has been no code regression before shipping the product out).

In the end, we will have to rely on the information provided and forge ahead. There is also never any harm, if you feel that there is no clear focus provided, to ask the question: Is there anything in particular the client is wanting us to focus on at this time? You might be refreshed at what avenues of testing that will open up for you.

Writing High-Value Bug Reports

Report bugs, not symptoms (Lucas Dargis)

The other day I was the TTL of a cycle and one of the features in scope was an account creation screen. The user was required to enter several pieces of information including their Address. Two different testers report these two bugs:

Bug 1 – Address field allows “!!!!!!!!!!!!!!!!!”
Bug 2 – Address field allows “!@#$%^&*()_+”

I see this type of thing all the time, so I know some of you saying “What’s wrong with that?”. The problem is both of these testers reported different symptoms of the same bug. If they had taken some time to do further investigation into the Address field, they would have realized that they hadn’t found a specific input that made it past the validation. They would have learned that the real issue was the Address field wasn’t being validated at all. The user could have entered anything (or nothing) and the system would have accepted it.

Whenever I encounter a bug, I spend a significant amount of time testing all around it, trying different inputs and different sequences of events until I  understand the root cause and all of its symptoms. This is where testers can show their worth. It’s easy to click on something and then report on the results, but it takes a much stronger skill set to be able to investigate potential bugs and then provide a valuable report of your findings. Customers can see this effort and they usually reward it.

Sell Your Bugs’s Prominence (Lucas Dargis)

If a bug is easy to find, it is usually more valuable then if it was an edge-case bug and it was unlikely that anyone would find it. Identifying your bug and reproduction steps is just the first step. The best testers know that how their bug report is written can affect how the customer views it’s prominence (how easy it is to find). The best testers keep their bug reports focused and their steps limited to the critical path. That means you should only list the specific actions needed to trigger the bug.

There is a problem with this approach. Often, bugs are hidden deep within the application and you might feel that you need to explain how you arrived at the bug. The way I get around this concern is to list “Prerequisite” steps at the top of the “Actions Performed” where I describe the starting state of the application.

Example:

Bug Title: Shopping Cart – Items added to the cart are not saved
Steps:
1. Go to the URL
2. Click on create new account
3. Enter a valid username
4. Enter and password
5. Click “Submit”
6. Log into the system with your account
7. Search for an item
8. Select the item
9. Add the item to my cart
10. View your shopping cart

The above report lists the steps from beginning to end, but it is fairly long and gives the impression that a user would have to do a series of very specific steps in order to find the bug. Instead, you should only list the steps that are directly related to the bug. Let’s see what that would look like.

Bug Title: Shopping Cart – Items added to the cart are not saved
Steps:
Starting state – User is logged into the application and viewing the details page for a product

1. Add the item to my cart
2. View the shopping cart

Explaining the starting state at the top of the report allows us to remove 8 steps. Now, because only the steps that specifically cause the bug are listed, this bug seems much more prominent and the report does a better job of highlighting the value of the bug. This is an oversimplified example but I hope you understand the point.

This is just one tip on how to sell your bug. This technique is called “Bug Advocacy” and is something ever tester should learn. To learn more about Bug Advocacy, here is a fantastic paper written by Cem Kaner:http://www.kaner.com/pdfs/bugadvoc.pdf

I want to thank Allyson for her contributions to this article. Please feel free to post questions, comments or challenges to anything we’ve written. Hopefully these ideas will prove useful to you in your quest for those high-value bugs.

Additional Resources

Be Creative: Bug-Hunting Tips from a Gold uTester (By Amit Kulkarni) – http://help.utest.com/testers/crash-cou … ld-uTester

How To Write the Perfect (uTest) Bug Report (by Rebecca Showerman and Nikki Sedgwick)- http://blog.utest.com/how-to-write-the- … t/2012/06/

How to Write a Good Bug Report (By Sunil Sidhwani) – http://forums.utest.com/viewtopic.php?f=55&t=3095

When a Bug is Not a Bug – Bugs vs Feedback (By Aaron Weintrob) – http://forums.utest.com/viewtopic.php?f=55&t=3179

Bug Reporting 101 (By Joseph Ours) – http://help.utest.com/testers/crash-cou … orting-101

Improve Your External Bug Videos

If you have ever tried to take a video of a bug on your phone or tablet (Or if you are a test lead or developer trying to view them) you know it can be a challenge. If you you don’t know what you’re doing, your video can difficult to view and understand.

This is my first instructional video and it’s simply awful 🙂 Hopefully these tips will help to ensure your audience can get the full value from your videos.

One thing I want to point out. When I was using my iPhone to take the video of the Kindle, you’ll notice that my phone is in the portrait position. Videos taken in this orientation are saved sideways when you try to view them on a computer. To overcome that problem, simply make sure your phone is in landscape position when you are filming.

You can buy a Clingo stand for yourself here:
http://www.amazon.com/gp/product/B003JTHN4K/ref=oh_details_o00_s00_i00